This tutorial will walk you through the use of UNOMi Avatar Creator in Final Cut.
This is a tutorial on how to import 3D characters from Mixamo into UNOMi Avatar Creator.

UNOMi Avatar Creator is now available on FxFactory. You’ll be able to use the plugin in After Effects, Premiere Pro, Final Cut, and Motion.
This is the latest UNOMi Avatar Creator Plugin for Adobe After Effects and Adobe Premiere. The Plugin will allow you to easily create and animate 3D avatars. For more updates please go to the getunomi.com website.
This is the latest UNOMi 3D Lip Sync test from 3D artist Lachlan Thorpe. He used UNOMi 3D Lip Sync to automate the lip-syncing and animated the facial expressions by hand.
This a Lip Syncing test that we did using UNOMi 3D lip-Sync. The software allowed us to automate the lip syncing in seconds. From there, we imported the ANIM file into Maya and added it our GlowMan video game character. Download UNOMi 3D Lip Sync to get the same results.
UNOMi 2DLS is an easy to use software that allows animators to automate the lip syncing process with ease and efficiency. This article will walk you through the process.
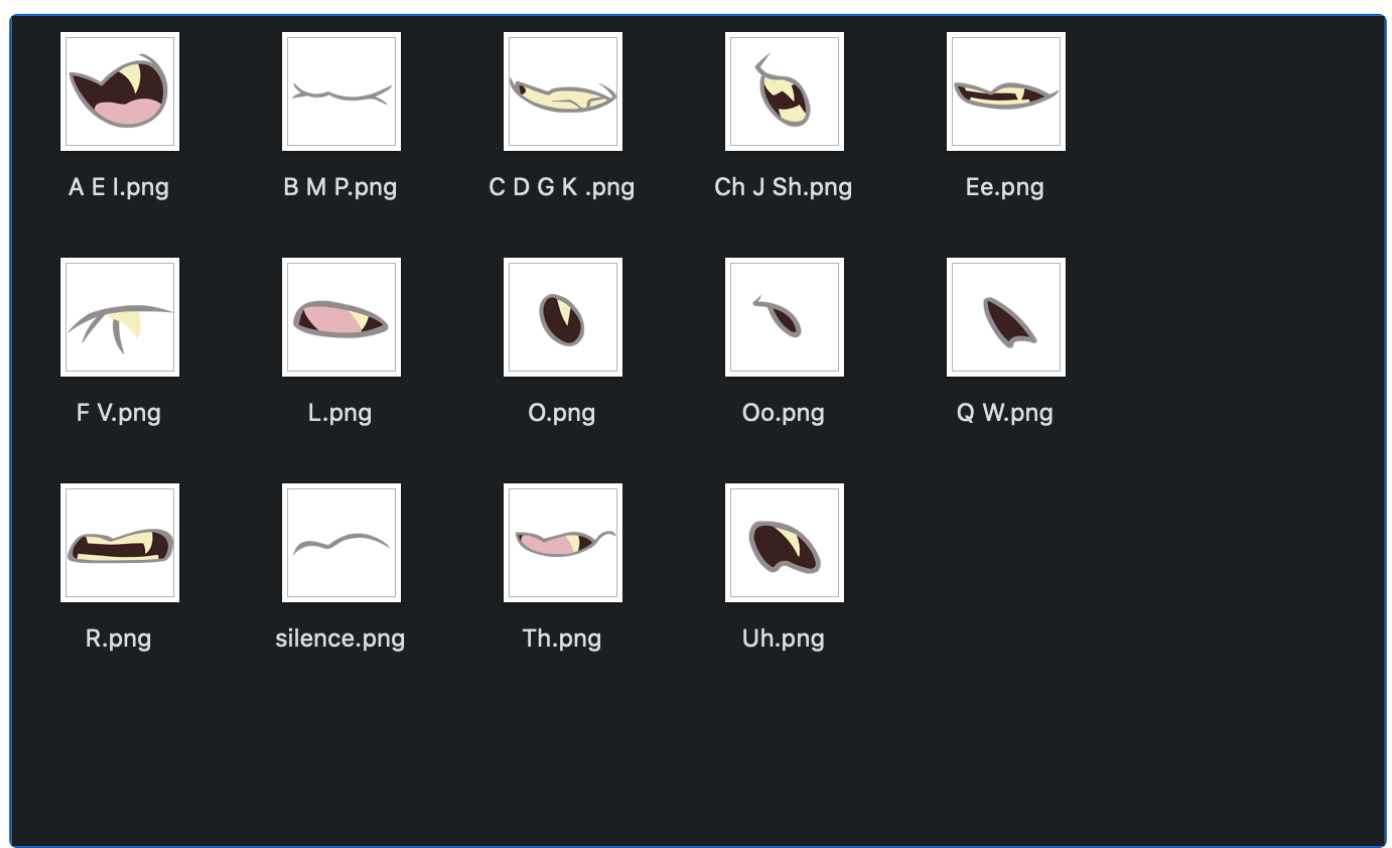
Phonemes and Visemes
Phonemes are the individual sounds that make up speech. Visemes are visual representations of those phonemes or mouth “poses”. UNOMi uses 14 phonemes. You’ll need to create these phonemes in the relevant styling of the character you’ll be animating.
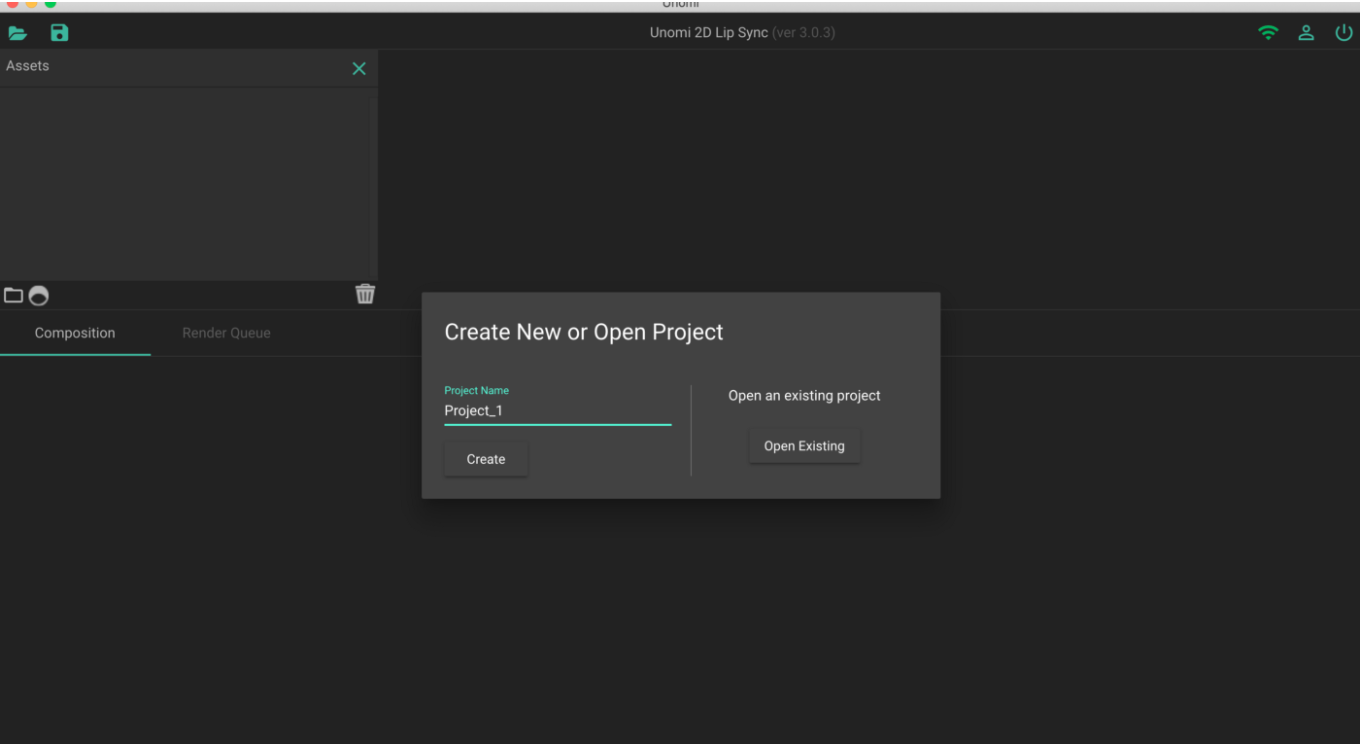
After you’ve created your phonemes, grab the audio file and transcript(.txt) of the character you’ll be lip syncing. Open up UNOMi 2D LS, sign in and create a new project.
Making Lip Sync Animations
Import your 14 phonemes, import your audio, and copy and paste in the text transcript. Use a shortcut by importing all of your files (text, audio and phonemes) at one time
After all of you assets are imported, press the sync button and whallah you have an animation!
Zoom in feature allows you to get a closer look at the text and keyframes in the timeline.
UNOMi does a great first pass, but if you’d like to make edits, deleting and replacing key frames is simple. First click on the keyframe you’d like to edit, hit delete, go the phoneme grid view, click on the phoneme you’d like to replace the keyframe with, and drag and drop it to the appropriate keyframe in the timeline.
Once you’re happy with your edits, go to render ->render settings. Choose which file format you want to render your animation as. UNOMi supports mov, avi, mp4, and png sequences. Use the slider to choose your frame per seconds. The default is 30 fps, but 16 fps seems to be the sweet spot. Click ok and click the Render All button. Download your file and your animation is ready to go.
Check out 0ur latest video featuring the beta version of our motion tracking software. This video features the Phase II process of our engineering process. This is just a test of how our software reacts to a human changing direction and rotation.
This is the latest update of our Markerless Motion Capture technology. We are using AI to track human movement and transcode that data to a 3D character. This is the latest video that demonstrates or advanced AI technology.
Hello guys, this is the latest test video demonstrating UNOMi Markerless Motion Tracking software. Our Mo-cap software allows any user to track human movement from pre-recorded video footage. Users no longer need complex bodysuits and motion capture facilities. It is set to be released in June 2021. More updates to come.